How to Use This Tool
- Enter documented CPU maximum power and total graphics-card board power.
- Add peak watts for the remaining components without double-counting.
- Choose an added margin and review the DC load, allowance and capacity target.
Calculation Method
Component-side DC load is CPU watts plus GPU watts plus other watts. Added allowance is that sum multiplied by margin percentage. The capacity target is load plus allowance. PSU efficiency is not applied to this DC output target.
Worked Example
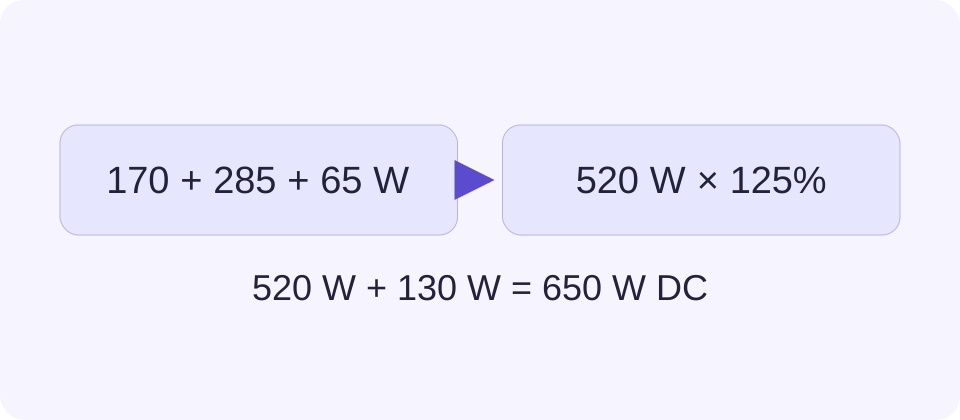
A 170 W CPU allowance, 285 W GPU allowance and 65 W for other components total 520 W. Adding a 25% margin gives 130 W extra and a 650 W DC capacity target. These are example inputs, not specifications for a particular build.
Collect Peak Values for the Actual Configuration
Use the documented maximum or configured power limit for the exact CPU and graphics card. A CPU base-power figure may be lower than its permitted turbo limit. A graphics-card board-power figure covers a different boundary from GPU-chip power alone. Record the source and the chosen configuration rather than selecting watts from a processor name or clock speed.
Other peak watts should include the remaining component load relevant to the build: motherboard, memory, drives, fans, pumps and powered accessories. Use documented values or defensible measurements. This field deliberately has no fixed watts-per-stick or watts-per-drive assumption. For multiple graphics cards, enter their combined board-power allowance in the GPU field.
Understand What the Margin Adds
The entered percentage adds an allowance to the component sum. With a 20% addition, 500 W becomes 600 W. The original 500 W would occupy about 83.33% of that target, not 80%. An added margin and a desired utilization percentage are different calculations.
A larger number does not establish that a supply can handle every short power excursion. Follow the component and PSU manufacturers’ requirements for the actual configuration. Keep the margin reason with the result, especially when comparing a planned graphics upgrade with a current build.
Separate Capacity from Energy Use
A PSU capacity target is a component-side output requirement. It is not a prediction that the PC continuously draws that much from the socket. Gaming, idle and combined stress workloads can have different consumption. Capacity planning and electricity-cost estimation need different inputs.
Conversion efficiency determines how much wall input is needed for a particular DC output. It does not mean an 80% efficient supply loses 20% of its stated DC capacity. Do not increase this calculator’s output again merely to account for efficiency. Use a representative wall measurement for running-cost calculations.
Check the Parts That a Watt Total Cannot Prove
Compare the target with the supply’s continuous output rating under its documented operating conditions. Then verify relevant rail capacity, connectors, approved cables, case fit and motherboard requirements. A higher aggregate watt rating cannot repair a missing connector or an incompatible modular cable.
The tool does not assess an existing PSU’s age-related condition or diagnose shutdowns. An unexplained shutdown needs troubleshooting beyond a watt sum. For a planned upgrade, record the exact part requirements and confirm them before treating the target as a purchase decision.
What the Result Means
This planner does not identify components or recommend a certified PSU model. A calculated watt target does not validate transient handling, rail limits, connectors, cables, dimensions, input voltage or the condition of an existing supply.
Common Questions
Is This the Same as Computer Power Supply Calculator?
Yes. PSU means power supply unit; both names describe this capacity-planning task.
Should I Divide the Target by 80% Efficiency?
No. Rated component-side capacity and wall input are different quantities. Efficiency affects the input needed to deliver DC power, not the DC load sum.